Showing posts with label Feeding the Clan. Show all posts

Saturday, April 7, 2012

Mini-Meatloaf: The kids will love it!


I found this Mini-Meatloaf idea on Pinterest and decided to try it out.  The original Pin had basic instructions, but I thought you could use a few more....you know, to make your first try be successful.  Above was my first try.  They tasted AMAZING...like always, but that's because I used my TnT (Tried 'n True) Amish Meatloaf recipe.  I'll share that a little later.  You're welcome.


Step 1: Prepare your favorite meatloaf recipe.

Step 2: Pack the muffin pan tightly with meat mixture.  If you fill it to the top, make sure you place a layer of tinfoil below the pan, or place it on a cookie sheet to catch grease drippings.  Mine didn't drip at all from the metal pan, but did slightly from my silicone muffin pans.  

Step 3: Bake at 350* for 15-20 minutes. Make sure your drippings run clear.
Step 4: Add a bit of sauce on top and let it bake for 2-5 minutes extra.
Step 5: Add a medium size cookie-scoop of your favorite mashed potatoes on top.
Step 6: Devour! Then come back here and leave me a comment on how awesome I am.  :)


In my first try, I didn't pack the meat in very tightly.  I knew it would shrink up, but I was afraid of grease spilling out and possibly catching fire, or causing the Earth to blow up, or just having to deep clean my oven...something catastrophic like that.  
While some of the mini-meatloafs came out like full size flat-topped cupcakes, the others turned into scrumptious meatballs.  I ate them regardless.


Amish Meatloaf

3/4 cup Oatmeal (Use Gluten-Free Oats if needed)
1 cup Milk

2 lbs ground beef

2 eggs

1/2 medium onion (optional)
Salt & Pepper

Sauce:
1 cup Brown Sugar
1 cup Ketchup
2 tsp Yellow Mustard
Several dashes of Worchestire sauce
(Combine all these ingredients into a small saucepan and bring to a boil...stirring constantly.) 

Directions:  

Combine oatmeal & milk into a mixing bowl and let sit for 5 minutes.  Add remaining ingredients and mix with hands or stand mixer until meat is well mixed and soft.  If you've ever eaten a meatloaf that tastes like someone just took the meat from the package and cooked it...this is why.  Always mix your meatloaf extremely well.  It makes it moist.  

::Follow directions above or put mixture into a loaf pan (bake loaf for 1 hour at 350*)::

Enjoy!!

Monday, January 9, 2012

Amish Meat Loaf

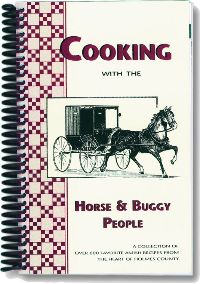
My Facebook friends have asked me to post my Amish Meatloaf recipe. Of course, I can't take the credit for this scrumptious recipe because I found it in an Amish cookbook several years ago.  I can't remember if it is in Volume I or II and they are both packed away in storage until we move.  If you love Amish cooking, you'll want to buy these two books. They are my favorite, and I have several different Amish cookbooks.  


Amish Meat Loaf

Ingredients 
2 pound uncooked lean ground beef (I use 93/7 usually)
3/4 cup uncooked oatmeal (Gluten-Free if needed)
2 large egg(s)
1 cup 2% reduced fat milk
1/4 cup onion(s)
Salt & Pepper to taste
Sauce:
1 Tbsp Worcestershire sauce
1/2 cup unpacked brown sugar
1 1/2 tsp mustard
1/4 cup ketchup
Instructions:
Beat eggs; add milk to the oatmeal and let sit for 5 minutes.  In large bowl, add ground beef, eggs, onions, salt and pepper; mix well.  Add oatmeal w/ milk to the ground beef and mix well.  Place into loaf pan. Bake 350* for 45 minutes. Cover with sauce and bake additional 15 minutes. 

I usually double my recipe to feed our large family and to have leftovers.  Our family does not eat many leftovers, but we don't waste a morsal here.  So yummy!!!  The next day, if you have leftover meatloaf, make a grilled meatloaf sandwich on your favorite bread....Gluten-Free if you're like me.  When it's done grilling, add some sliced tomatoes and a piece of lettuce. You can put some mayo on it, but really you don't need it. 

*My suggestion* Double your sauce recipe so that you have leftovers. Warm the leftover sauce in the microwave and then drizzle over each slice as it is served. YUM!!  It's also great to have a bit leftover to drizzle on your sandwiches the next day.  :)


Wednesday, August 18, 2010

Manna from Sweden!


A couple weeks ago, I noticed one of my recent clients was once again listed on my work schedule. She was having issues with her CapTel 800i telephone and needed my assistance, but her appointment wasn't for another week. Since I was delivering in her area, I called to see if I could come sooner. She was thrilled...of course.

When I arrived at her home, I saw beautiful rounds of homemade bread cooling on her countertop. More rounds were baking in the oven and the house smelled scrumptious. After I successfully fixed her new phone and I knew I was, once again, her best friend, I thought I should inquire about her recipe. I'm sneaky like that.

She graciously offered me a warm round bread loaf and went downstairs to copy the recipe that had been passed down from generation to generation. In fact, when the current recipe card was written in English, her own mother (years ago), scribbled the measurements back into Swedish so she could read the recipe....I have that scribble! As a bonus, I also received another recipe that was written completely in Swedish on the card, "Äpple kaka" or Apple Cake. She went over the Apple Cake recipe so I understood that "socker" was sugar and "bakpulver" is baking powder. She completely lost me when she started talking about dl measurements and I figured I would never be able to make the cake until I opened my recent IKEA catalogue and saw this....

$4.99 and it has DL markings on the side! Yes, it's providence.

The bread round was delicious! So amazingly delicious! It almost tasted like a scone, but it wasn't fried. My client told me that in Sweden they eat open faced sandwiches. They cut the round in half and then slice the half down the middle to make a "sandwich". I thought about how yummy and appetizing the rounds looked and how having a beautiful bakery type bun might just make our plain old turkey sandwich a bit more appetizing.

The next morning, I decided to try my hand at this new way of making bread. I was stuck in the humdrum of making loaves of bread and most of it would go to waste. The bread was never what my kids or I wanted to eat. It's not that it wasn't good, it just wasn't what we were accustomed to...you know, Sara Lee or Home Pride. On the first try, several rounds came out
beautiful and few came out a little flat. I made 17 rounds of different sizes from one batch. My KitchenAid Professional 5 mixer was protesting the whole time, but I stroked and kissed it and she grumbled her way through the kneading process. Whew!! The twins sprinkled grated cheese on top of the flat ones and made open-face cheese sandwiches, which I praised them for....as long as they clean up their mess. I'm always saying that around here. For dinner the next night, I spread garlic butter on a few rounds and baked them in the oven for several minutes. They were marvelous! I was thrilled when we were down to the last two loaves, so I decided to make another batch....hoping this wasn't a fluke and I might be able to use this recipe as our choice of bread. Never again buying sliced bread from the grocery store would be a dream come true!

My second attempt was even better, except that my KitchenAid was not at all happy that I wasn't making brownies or banana bread. I think she has a sweet tooth. I discovered my KitchenAid is only good for soft mixes (cake, brownie, sweet breads and pudding), which is a total disappointment, by the way. I think I should save my pennies or ask Santa for one of these....

Yes, I know it's currently $359, but I hear it's the BEST bread mixer around. In fact, my Swedish client has one that is 30 years old. Of course it's not this exact model, but it does everything. Oh Santa, I BELIEVE!

Oh yeah, the second try. All my rounds came out beautiful and I even made little ones, for personal sized sandwiches. I figured I'd try making small ones to fit into the kids Bento boxes since I'll be making school lunches soon. The kids grabbed warm rounds and gobbled them up. Chloe made a PB&J sandwich on one yesterday and exclaimed, "That was the BEST peanut butter sandwich ever!" With some of the dough I added dried basil, oregano, and garlic to make herb breadsticks for our pasta dinner that night.

For our large family, I'll be baking this bread a lot and you know what? I'm completely happy about that!


Monday, September 7, 2009

Home-spun Labor Day Fun

I have never been, and never will be, a night person. Once I am asleep it will take an actual fire alarm to wake me up and last night was no exception. It shouldn't surprise anyone that I didn't know Caleb had vomited twice during the night, Rob had also vomited (while cleaning up after Caleb), Caleb was in bed with us and was in the middle of vomiting (for the third or fourth time) when I finally woke up enough to realize that my child was sick. Rob didn't wake me because he knows I can't handle it. We both would have been sick and that would not be good.

Rob woke me up about 8:40 so that I could take my mom and Nana to the airport. Caleb had a fever so, after I dropped them off, I stopped at Wally World to buy some chewable Tylenol, popsicles, Chicken Noodle soup and Gatorade.

Rob and Caleb have been snuggled in bed watching movies and playing Xbox all day. They stopped long enough to eat some soup. Caleb still has a fever, but hasn't been sick since early this morning.

The other kids have pretty much entertained each other while I finished some Crawford work and my time sheet. They were being so good that I decided (before they became bored and started killing a sibling or two) it was time to put them to work making Mini Bagel Pizza's for dinner and the freezer. It was a mixed reaction. The older boys weren't thrilled that I was making them do a pre-school project, but they all did a great job.


Feverish Caleb (eating chicken soup) watching his siblings create his future snacks.


The kids and hubby thought the homemade pizza sauce was yummy! Why I was so afraid to make my own sauce and pizza is beyond me. I can't wait to start saving money on something we eat often!!

Mini Bagel Pizza's

1 bag of Mini-Bagels cut in half (I use the ones from Cost-co)
Cheese (we used Italian blend and Mild Cheddar)
Olives (ours were whole and the kids did the slicing)
Pepperoni
**Use your favorite toppings, leftover's, etc.**

Pizza Sauce

1 can (28 oz) Tomato Puree
1 1/2 cups water
1 tablespoon dried parsley
2 teaspoons dried basil
1 teaspoon dried oregano
1 tablespoon Italian Seasoning
1/4 teaspoon black pepper
1/4 cup olive oil
2-3 tablespoon's garlic powder
1-1.5 teaspoon salt
2 tablespoons sugar

Combine all ingredients into large bowl and whisk until blended. Taste and add more seasonings as needed.

Spoon sauce on to bagel, add toppings and bake for 10-15 minutes in a 350* oven.

You can also microwave these, but I wouldn't. The bagel may be edible and chewy for a few minutes, but it will soon be too chewy.

Freezing Mini Bagel Pizza's: After the kids created all the mini-pizza's I put them on cookie sheets lined with freezer paper and put them in the freezer for 30 minutes - 1 hour. Cut wax paper (or freezer paper) into squares and alternate bagel/paper/bagel/paper for bulk storage or indivudally wrap each bagel. Toss them into a freezer Zip-Lock bag or other preferred container for freezer storage.

You'll probably want to bake the frozen bagels at 400* until the cheese is bubbly and golden brown.

Now that the kitchen is clean, the clan is fed and my sickies are resting, I am off to prepare for our busy day tomorrow, which includes, a double tonsilectomy, loads of laundry and the possibility of more vomiting children.

Wednesday, June 10, 2009

Garlic Chicken & Asparagus w/ mini Farfalle pasta

Two recipes in one day?  Ahh...the luck of the Irish isn't too far away me laddies!

This is a really yummy dish that I whipped up without a recipe.  GASP!  I am the one that cringes when a scoop of flour isn't leveled off properly.  So, to be completely honest, I did google "garlic butter noodles" just because I didn't want to put 5 lbs of butter in my dish when it should only be a few tablespoons. Guidelines people, guidelines.  I didn't follow the recipe, just took into account the serving amount and ingredient amounts so I could adjust mine as needed.

I don't really have measurements because I just added stuff here and there, but I'll try to recreate it for you.  I apologize for the colors in the photograph.  You see, my camera...  Well, it's just that, I took this photography class and....

.....oh nevermind. 

My kids loved it and Rob said it was something he would want me to make again.  My standard question, on new recipes or things I make up, is "Did you like it?  Huh? Huh? Is this something you would want me to make again?"  

Garlic Chicken & Asparagus w/ mini farfalle pasta.

Serves: 7
2 adults, 3 teenage boys, a hungry 1o yr old girl and an "I only like the chicken." 7 yr old boy.  

5 boneless-skinless chicken breasts
olive oil (I used total about 2.5 cups)
garlic powder
16 garlic cloves
butter (optional)
Barilla mini farfalle pasta (I love the mini's!!!)
asparagus
Italian seasoning

1. In a large skillet, brown the chicken with a few tablespoons of olive oil on medium heat.  Sprinkle garlic powder on the chicken and again on the other side once the first side is done. I leave the lid askew to let the steam escape slowly.  I don't want the chicken to boil, but I do want it moist.  I'm getting better with cooking chicken.  It's really a science on keeping it moist and flavorful.

Tip: For a lower fat option (with great flavor) you can use chicken broth instead of olive oil to cook the chicken.  

2. While chicken is cooking, start the pasta following directions on the package.

3. When chicken is done set aside on plate (or clean cutting board) to rest.  Letting chicken rest allows the juices to marinate for a bit before you cut into it.

4. Pour about a cup of olive oil in the same skillet as the chicken was.  Do not clean it out.  That's yummy flavor in there.  Keep heat on medium-low.  Add garlic to olive oil.  Add butter if you wish.  I think I added about 5 Tbsp.  Add in Italian seasoning...just a few shakes will do. Stir well making sure the temperature does not raise so much that the garlic burns.  Add in chopped fresh asparagus.  Cover skillet to help steam the asparagus.  When asparagus turns bright green it's done.  You do not want to let it steam too much or it will get soggy.  

5. Drain pasta (it only takes 7 minutes to cook) and return to it's same pan.  

6. Cut chicken into strips and add to pasta pan.

7. Pour sauce mixture over pasta & chicken.  Toss until well coated.  You don't want so much oil that it's over-bearing.  Just enough to coat the ingredients.  The flavor is in the garlic, so if you love garlic... use more, if you like garlic... use less.  

Serve w/ french bread and a salad, or you know...in our case, Banana-Banana Bread.  

Enjoy!  My family sure did.

Banana-Banana Bread

Yesterday evening, Rob came home from a long day at work and took the kids to the pool so I could finish baking banana bread.  I really needed to use the bananas or Rob would surely throw them out.  He's done it before and hasn't learned his lesson.  

I found banana's a week or so ago for $.39 cents a pound, which of course meant I needed to buy several pounds.  Within that week, I had purchased another several pounds hoping I would have enough left over to make banana bread.  I did.  

Brenden asked if he could help, so I thought this would be a great way for us to hang out.  I showed him the recipe and he went to work.

First we peeled 23 bananas and mushed them up.  My Banana-Banana Bread recipe calls for seven bananas, so I figured it would be about 3 heaping cups.  Brenden is a pro at handling my Kitchen Aid.  He's very careful with it and makes sure he's doing everything "just right".

When Casey asked if he could help crack the eggs,  Brenden replied, "Not today.  I just learned how to break them perfectly."  Huge emphasis on "perfectly".  Oh and this 15.6 year old young man even shared the beater with the brother he wouldn't let help crack the eggs.  

Can I get an "Awwwww!"?

Each batch made 2 loaves and we made three batches.  We were able to get four large loaves and 6 larger mini loaves.  

Banana-Banana Bread

Ingredients:

1 cup butter, softened
2 cups sugar
7 large ripe bananas, mashed
1 1/2 teaspoons vanilla extract
4 eggs, slightly beaten
3 cups flour
1/2 teaspoon salt
2 teaspoons baking soda

You can add in mini-chocolate chips, coconut, raisins, nuts or even dried fruit if you wish.

Directions:

Makes two loaves.

1. Cream the butter and sugar. Blend in the bananas, vanilla and eggs.

2. Whisk together the dry ingredients.

3. Add to the banana mixture and mix until just combined. Pour into two greased 9x5 inch loaf pans.

4. Bake at 350F. Check on the bread after 35 minutes (it may take up to 60 minutes). Banana bread is done when a toothpick inserted in the middle comes out clean. Cool the banana bread in the pan for 10 minutes then cool completely on a wire rack. 

If you like more banana flavor then this is the recipe for you!  Let me know if you try it.  

Monday, June 8, 2009

Just call me "Oscar"

I've been feeling a little off lately, though I'm not sure why.    

I haven't had any desire to take photographs and I adore photography.  I picked up an HTML book from the library and haven't even cracked it open, but I've longed to learn how to develop my own web pages.  I've tried to read a book about clutter and my mind wanders, yet I breathe organization.  What's up?

I guess I'm just selfish, tired and grouchy.  When things do not go the way I hope they will, it makes me feel like I've failed.  Like I didn't do, or couldn't do, enough to get it right.  Why do I do this to myself? I also seem to get down about the silliest of things.

Example #1

I got books from the library and watched a tremendous amount of Youtube videos on how to make a sourdough starter so that I, too, could make sourdough pitas or pancakes.  My endeavor failed and while I learned that "Hooch" is also known as "Moonshine", I cannot, for the life of me, make my own sourdough starter. Wait...I can make it and it does form bubbles and hooch and it smells sour, but it does not rise bread.  Of course not.  Why should it?  It's sort of like the fish I once owned.  I could feed it and talk to it, even give it a clever name, but it would die much too early because fish and sourdough just do not like me.  Do wild yeast spores actually care if I make anything out of them?  I'm sure they are happy that I've provided a wonderful place for them to feast and play huge tricks on me.  Meanies!

What should do?  Try again.  Keep at it.  I'll get it eventually.  I'm a great cook and I can bake with the best of them, so don't give up.  "Hey grumpy lady! Why don't you just walk in your kitchen and sniff...I'm sure those very ripe banana's could be made into 4-5 loaves of yummy banana bread.  Mmmmm! Plus, if you don't hurry and use them your husband will toss them out and then you'll be really mad.  I'm just sayin'."  

What do I want to do? Cry. Give up. Silly huh?  "Oh, Woe is me.  I'm a failure.  I can't learn via youtube videos or reading a thousand different versions of how to's.  I need someone to show me how and then I can do it perfectly."  

Example #2

I took a photography class to learn more about my camera.  The one I thought was a good one. We paid a lot of money for it and I loved it.  It took much better photos than my previous camera and the video was amazing.  I wanted to learn how to get in close without making my subject blurry (among other finer details).  I had failed photography in my sophomore year of High School, but even though I didn't want to take the time to learn about how to develop my own film (isn't that what one hour photo's were for?), it didn't mean I hated taking pictures.  I wanted to show that I could learn photography, that I did have a passion for education.  So I gave myself a Birthday present. After a couple weeks in the class, I realized that my camera wasn't really what this class was for.  Sure, it had some manual settings (which I did learn how to use), but my teacher took the time to go over my camera with me and I left the class wondering if I should even go back.  He didn't knock my camera, he just told me that my camera would not be able to capture the type of photographs I wanted.  No matter, I stayed in the class and learned as much as I could.  Asking my classmates if I could handle their camera's allowed me to get a feel for what I wanted.  A Nikon D90 or a Canon Rebel...something like that.  It also left me feeling very envious of these people.  I mean, some of them had $2000 cameras and $200 camera bags,  yet they didn't even know what an "F-Stop" was.  I know more than I want to about my camera at this point.  Ignorance is bliss.  Part of me wishes I never took that class to begin with.  HA!  Furthering my education, by taking a community class, has left me pining for a DSLR.  Heck, I'd even settle for a used one with a decent lens.  

What should I learn from this?  That I'm selfish and a complainer.  That I should look at what I do have and be thankful for those things.  Healthy children, a kind and loving husband, a wonderful mother who I adore and am grateful for, having more time with my Nana,  friends, my faith....there are so many things I am grateful for.  Don't get me wrong though, I still want a camera.  Of course.

(Yawn) I am ready to take my grouchy self to bed.  Maybe a good night's sleep will get me out of this funk.  Oh and praying for sweet Stellan (and his mama) & April Rose (and her mama) will help, too.  

On a happy note: I get to send off the produce bags today (6.9.09).  I love making someone's day!!!  

Thanks for listening to me whine.  I've always wondered where my daughter gets her high quality whine from.  (Ahem)  

Sunday, May 31, 2009

Talk About My daily bread


Sunday was a wonderfully domestic day in the kitchen.  However, wonderfully domestic does not transcend to the laundry room (where I really should have been) nor the bathrooms.  In my defense, my children normally take care of the bathrooms, but I gave them the day off so I didn't have to deal with complaining children while trying to think  I could concentrate on baking bread.

Yes, yes, I get the gold-star mommy award for the day.  Thank you. Thank you.  ::bowing::

I have to admit, I am not much of a bread baker and have spent the past three weeks looking for a bread machine to "do the work for me".  Problem is, I know what I want in a bread machine and unfortunately, those bread machines cost way too much.  I even looked at thrift stores, praying before I entered "Please God, let me find a breadmaker that works and doesn't have dead roaches in it."  No luck.  Apparently God wants me to knead the dough by hand.  You are aware that God has an amazing sense of humor, right?  I'm not sure why I am always the subject of these kind of jokes, but whatever...He's God.  Who am I to question how He grows me.  In fact, if I weren't so stubborn, He wouldn't have to use such methods.  

Taking the hint, I decided to take my kids to the library and research bread books.  I've had my eye on sour dough ever since I read The Lazy Organizer's post about heavenly sour dough pita's .  First, I begged Lara for some starter and then she ignored me.  Hmmmph.  I guess she has other things to do like, make us all envy her beautiful figure (as we all gulp down massive amounts of Green Smoothies so we, too, can lose weight without trying),  express her fabulous sewing skills,  or maybe she was just taking care of her family while preparing for an important trip where she is speaking at a seminar.  Yeah...I think that's it.  She would offer me a cup of her starter if she had even a moments time to think, let alone pack, ya know.  We're, um.....tight. 

All kidding aside, I do wish Lara a safe trip and successful seminar.  Oh, and Lara, because you didn't save me, I did research on my own and now I can use words like "Mother Sponge", "Baby Sponge", "lactobacillus" and "starter" in a sentence.  Plus, the best part is....we now are the proud owners of a new "pet" that we must feed every day, unless we put our "pet" in the fridge and then we have to feed it every week.  Apparently, cold pets don't need to eat that often.  I wonder if Lilo would like the fridge?

Back to the bread.....

I'm sick of wasting money on loaf after loaf of bread.  I feel it's my duty to keep bread on hand in case any of my constantly hungry children want a sandwich.  I typically buy two loaves and they just sit there half eaten.  Mostly because it's school time and the kids prefer school lunches.  I know that doesn't mean I (or they) can't pack a yummy lunch, it just means the schools in our district do a pretty decent job of preparing healthy meals.  I'm sure I could do better, but if my children are anything like me, it's a bummer to have a soggy peanut butter and jelly sandwich waiting for you when the aroma of mashed potatoes and gravy seeps under your classroom door.   

Now I know you're thinking, "Why do you buy bread if nobody eats it?", believe me..I've asked myself that question many times.  The thing is, we do eat bread, just not often.  However, when we make sandwiches, we tend to go through two bags of bread at a time, which is why I usually keep two loaves on the counter.  We also prefer to eat more artisan type breads, sourdough, whole wheat baguettes and Rhodes rolls for sandwiches.

Despite my desire to stimulate the economy and use a months income on a new camera, I am feeling frugal when it comes to groceries.  My cart, in the past few months, has held less and less processed foods and more and more produce.  This definately doesn't make much of a difference in my grocery bill, in fact, it is probably a bit higher though I haven't really processed the numbers. Seeing my children pick an apple or slice of cheese for a snack instead of a handful of potato chips makes me feel like I'm doing something right.  I'd rather keep my kitchen stocked with fresh fruit and veggies, smoothie ingredients and a few healthier easy foods than all the crud I used to purchase.  

Which, oh yeah, brings me back to bread.  

I actually made two loaves of Honey Whole Wheat bread (that the kids and hubby loved) and piadina's on Sunday afternoon.  We topped the piadina's with turkey, avacado, bacon, tomato and lettuce for a quick and yummy Sunday dinner.  I cut mine up and drizzled Basalmic Vinegar dressing on it and instantly decided that Basalmic Vinegar dressing must go on everything.

I'm sorry for the lack of pictures.  It probably makes my blog posts rather boring, but with all the clean up and the kids scarfing down everything...I just didn't have time to take a photo.  Next time I will.  I still would like a bread maker, just because my Kitchen Aid wasn't handling the dough very well.  The last thing I need is for that to burn up.  I would cry if I lost my Kitchen Aid.  

Here is the piadina recipe if you are interested.  

Now I must go feed my "pet" and research sourdough pizza crust recipes.  I'm thinking a garlic chicken alfredo topping sounds wonderful.  Don't you?  


Thursday, March 5, 2009

sick

I haven't been blogging lately because it's all I can do to be a mom, work part-time and get the minimal amount of stuff done.  Some grotesque germ invaded my body and has taken over.  It's mean and vile and doesn't seem to respond to any drugs or garlic.  Believe me, I've tried.  Nyquil has been my friend at night.  It's good to have a friend. 

I have a raging sinus infection that will not go away.  I spend most of my nights hacking up a lung, nursing my sore throat and oh yeah...playing a dozen or more rounds of SLINGO on my son's Nintendo DS while I lay in bed trying to forget how I much I hate to be sick.  Now that was a major run-on sentence.

I did, however, manage to make the best pot roast ever on Tuesday.  I found a picnic roast for $1.99 a lb, which was fabulous. Usually I use Lipton's Onion Soup mix, but decided to try those new Slow Cooker mixes I've seen lately.  Oh my, it really gave my slow-cooked pot roast amazing flavor.  The meat came out so tender and yummy!!

 
While I've been sick, I've managed to clean out my kitchen pantry.  As we've been using more stuff in there, and buying less, the space wasn't being utilized in the best way.  Half filled bags of cereal, boxes with only a couple granola bars in them and various other things that were driving me nuts.  I figured it was about time the pantry was cleaned out and reorganized.  I dumped the half bags of the same cereal into larger pourable containers and put the granola bars into a container.  I even managed to fill a large container with instant oatmeal packets.  All the boxes and bags went into the recycling bin and gave me a TON of space for more food.  Gotta love that!!  Unfortunately, I don't have a picture because, well, that would just take way too much energy on my part.  

I've also been spending any extra computer time making sure everything is ready to go for this month's Irish madness.  This includes about 20 or more performances, a parade, siamsa and a recital.  I love doing all of that, so it's not a big deal, but it does take up a huge part of my time. We Irish know that March is hectic and this crazy mama LOVES it!

Gotta go watch some reel's and jig's.  You want my life, I just know it!  ;)


Monday, February 2, 2009

Valentine's Day Decadence


I wanted to share a wonderfully decadent dessert that I've made for Valentine's Day for the past 4 years.  At the time, I was an avid follower of Chookooloonk's who first posted about the scrumptious cake she chose to make for her daughter's first birthday.  I still read her blog from time to time....she's an amazing photographer!  My family and friends have begged me to make this cake ever since day one.  It's an easy recipe and one that will not disappoint. Well, unless you're my mother and would prefer something made with vanilla or banana.  The less chocolate, the better.  However, you could be like my Nana who absolutely loves chocolate, in which case, you'll love this recipe.  Just like her.

By the way, you can buy the heart shaped bundt pan at Spoon's & Spice,  if you're wondering. 

My glaze, on this cake,  didn't turn out smooth because I didn't have any light corn syrup, but it was still yummy.  


You really don't even need frosting or glaze.  It's so rich and moist as is.  I'll have you know that I am one of those crazy people that removes 80% of the frosting before I even take a bite of cake.  I also prefer the middle,  so my "you don't need frosting" tip might not be for those of you who prefer a corner piece.  

CHOCOLATE CHOCOLATE CHIP CAKE

1 18.25-oz package chocolate cake mix (I use the Devil's Food from Duncan Hines)

1 3.9-oz package instant chocolate pudding mix
1 cup vegetable oil
4 eggs
1/2 cup hot water
1 cup sour cream
1 teaspoon vanilla extract
1 cup mini semi-sweet chocolate chips

1. Preheat oven to 350 degrees Fahrenheit (175 degrees Celcius). Grease and flour a bundt pan. I love the Crisco spray (like Pam) that has flour in it.

2. Combine cake mix, pudding mix, oil, eggs, hot water, sour cream and vanilla. Beat until smooth. Stir in chocolate chips. Pour batter into bundt pan.

3. Bake for 1 hour. Allow to cool for 10 minutes, then invert cake onto wire rack and let cool completely.

DARK CHOCOLATE GLAZE

4 oz semi-sweet dark chocolate (again, I like Ghirardelli's)
3 tbsp butter
1 tbsp milk
1 tbsp light corn syrup
1/4 tsp vanilla

In small, heavy saucepan or microwave oven on medium, melt broken chocolate with butter. Stir frequently until smooth. Remove from heat. Stir in milk, syrup and vanilla. When glaze is cool, pour onto cake. Let glaze run down sides. Chill about 10 minutes to set glaze.

*Note* I did copy and paste the recipe from Chookooloonk's and added a few of my own recommendations.  Here is a direct link to that post.  


Friday, January 9, 2009

Sticky Lemon Chicken


Sticky Lemon Chicken

Olive oil- I just guessed...maybe 4-6 Tbsp
7 boneless-skinless chicken breasts cut in half (you can use any chicken pieces in this recipe)
1.5 lemons
2 tbsp Seasoned Rice Vinegar (or any cooking vinegar)
3 cloves of garlic -sliced
Salt & Pepper
Big Pinch of Dried or Fresh Basil
Big Pinch of Dried or Fresh Rosemary
1/2 c Honey

Heat olive oil in frying pan on med-high.  Cut chicken breasts in half (or any other pieces use whole).  This just aids in the cooking process.  Slice one lemon in thin slices and set aside.  Slice another lemon and use the juice from half the lemon to add to the chicken once you put it in the pan. When the oil is hot, place chicken in pan.  Add lemon juice from half a lemon and vinegar at this time.  Chicken should start to brown after a couple minutes....make sure your pan is hot enough so that the chicken doesn't boil.  Add salt, pepper, basil and rosemary.  Add lemon slices on top of chicken.   Browning should take about 4-6 minutes depending on thickness of chicken. 

When chicken is almost done cooking add sliced garlic and allow to cook for just a couple minutes.  Do not cook for too long or it will become bitter.  Add honey.  You'll see the sauce thicken.  Turn chicken to coat in honey.  

Place chicken on a serving dish and pour sauce w/ lemons on top.  Serve with rice and vegetable. We also served it with a speciality bread that hubby brought home from Volker's Bakery here in Utah.  They have the most amazing breads and the dipping sauce is to die for!!  The garlic is amazing!  If you don't like garlic chunks you can just use garlic power, but I LOVE garlic. It's has the perfect flavor when cooked for just a couple minutes and doused with honey/lemon sauce.  YUM!!

By the way, not one piece of this chicken was left from our family of 7.  The kids loved it so much!  They weren't so sure about the lemon flavor, but the honey really sweetened it up.  It's really yummy.  I'm not so sure how to make it any more sticky without having the honey be to overpowering.  I'll have to play with the recipe a little more.

Monday, January 5, 2009

Potato Beef Skillet


This is a picture of my youngest son (7). He was gobbling up all the celery sticks and decided to show off his recently lost tooth. It's blurry because it's darker in my kitchen and though my white balance was working I did not have a tripod to keep it still. Oh, and asking a hungry 7 year old to "stay very still" 3-4 times just doesn't work at my house.

Being semi-organized means that I don't always have something prepared for dinner on the nights we are at Irish Dance. Usually, that's because I really haven't given it much thought, nor have I purchased items that are edible.

Tonight was snowy and the roads were icy, traffic was crawling and everyone was hungry. I had plenty of time to think of something different and easy on the ride home, so I came up with this little idea. I even googled it when I got home just to see if someone else had any other suggestions on how to cook it. In semi-organized fashion, I even called ahead and asked hubby to brown the ground beef and peel potatoes. I love him!! He's amazing and extremely helpful!

The kids really loved this dish and asked me to make it again. I will! Next time I'll try to prepare the casserole before we leave for dance and just have the older kids put it in the oven. We served this dish with french bread & celery sticks loaded with cream cheese or peanut butter. It was a hit!

**Edited 1/6/09 to add** This recipe fed seven people with most of the kids taking a small second helping. I didn't have any leftovers.  If you have a smaller family just cut everything in half and you'll be just fine.  You may want to use a smaller baking dish if you choose to cut it in half.

Potato Beef Skillet

2 lbs lean ground beef
6-8 small- medium potatoes peeled and sliced thin
2 Tbsp Olive Oil
2 cans Cream of Mushroom soup
2 c. Fat Free Milk
Spices, Salt & Pepper to taste (we used Garlic Powder)
Half a medium onion diced (optional)
2 c. grated cheese

Preheat oven to 375 degrees. Brown ground beef and onion in skillet and remove grease. Heat olive oil in another skillet on medium-high heat, add potatoes, spices, salt & pepper. Turn potatoes until coated in oil and some potatoes have started to brown. Place lid on skillet to help cook potatoes. Turn often to prevent burning. You want the potatoes to crisp, but not too much.

In separate bowl combine soup and milk, stir until creamy. Add ground beef. Stir until mixed well.

When potatoes are finished add soup mixture and pour into a 13x9" pan. Add cheese and bake for 30 minutes or until cheese is starting to brown. I had to turn my oven up to 425 to hurry it along.

**You can also make this as a casserole** Place a layer of potatoes in the bottom of a 13x9" baking dish then add a layer of soup mixture. Repeat steps until finished. Bake at 350 degrees for 1 hour. Add cheese the last 15 minutes or so.

Sunday, January 4, 2009

New England Corn Pudding

I woke up this morning feeling achy and exhausted. A typical Sarcoidosis symptom. I decided I wouldn't even try to go to church. Rob had already gone ahead of me to worship practice and I wasn't in the mood to get 5 kids ready. I slept in until 10 am and then decided I really wanted to make something nice for dinner. Unfortunately, my stomach wasn't finding any of the dishes I frequently make appetizing. I got online to search though my favorite blogs where I often imagine tasting the recipes they share.

I recently came upon this blog, Morning Ramble over my Christmas/New Year break and really find her inspiring and authentic. She doesn't even know I exist, but I follow her daily and am thankful she shares such yummy recipes and traditions with the blogosphere. **Patty knows I exist now because I asked her if I could use her recipe photo.**

As I was searching through her recipes I came across "New England Corn Pudding". It looks very yummy, but I wasn't so sure about the pudding part of it. Searching....searching.....New England Corn Pudding, again. This must taste pretty darn good if she's going to post about it a second time. The first time I saw it she had only posted the recipe...which, for some would be all they need, but I needed some ideas of what to serve it with. When I saw the recipe again I was pleased to see that she had posted her whole menu for the day. So, in true Semi-Organized Mom fashion, I only changed the dessert part. I'm serving Peach Crisp with Vanilla Bean or Butter Pecan ice cream. YUM!!

Two of my children and I went on a quick trip to the grocery store for "whole milk, ice cream and frozen corn" and ended up spending $69.00. That's okay...we really needed some groceries anyway. I love trying new recipes, so as soon as we got home, despite my sore joints, I went to work making this VERY SIMPLE recipe. I like Simple.

Before I share the recipe with you I have to give kuddos again to Patty from Morning Ramble for her inspiring blog and recipes. I also want to add that we have a family of 7 people, so I double everything. Patty says to put the mixture in a 2 qt. baking dish, but I knew it wouldn't feed our family. I doubled the recipe completely and then poured it in the lid portion of my large rectangle baker from Pampered Chef.


It did burn around the edges of the pan as the contents cooked and settled deeper into the dish and I was worried it would be burnt all over, but when I scooped it out the sides and bottom were golden brown. PERFECT! The top came out a bit burnt in areas, but I think my oven cooks hotter and I probably should have cooked it at 400 for a little longer. The kids really enjoyed it and for it being a first time recipe...I'm very pleased. Below is the actual recipe from Patty's blog. I hope you enjoy it as much as we did.


This photo came from Patty at Morning Ramble. I asked her if I could use it because her photo looks so much more yummier than mine. Thanks Patty!!

NEW ENGLAND CORN PUDDING
From The Governers Inn Ludlow VT


*doubled amounts in ()*
2 cups whole kernal corn (4-5 cups)
8 tbsp flour (1 c)
8 tbsp sugar (1 c)
4 whole eggs (8 whole eggs)
1 tsp salt (2 tsp)
1 qt whole milk (8 cups whole milk)
4 tbsp sweet, unsalted butter, melted (1/2 c butter....I think I used a little more..oops)

Stir the flour, salt, sugar, and the melted butter into the corn. Beat the eggs slightly and combine with the milk. Combine the milk and corn mixtures adn pour into a 2 qt baking dish that has been sprayed with PAM. Bake in a 450 degree oven for 45 minutes, until nicely browned.*IMPORTANT* stir with a long pronged fork, breaking the surface as little as possible 3 times during the baking.

**If you are doubling the recipe you may want to bake it at 400 degrees for about 1.5 hours. I had to bake mine at 450 for a little over an hour. Watch it to make sure. You will notice it firming up and not looking so liquid. Plan on letting it sit on a cooling rack for quite awhile. We served ours 10 minutes later and it was mildly soupy, but firmed up nicely while on our plates. Next time I make it I will let it sit out for at least a half hour and then just warm it up if needed.

Served with fried cabbage (just a little olive oil), mashed potatoes and french bread.

I'll try and figure out the Peach Crisp recipe soon, but I've never had the amounts for the peaches/juice...just the crisp part.